How to Set Up a Professional Home Office Lighting and Webcam Combo for Video Calls
By Logitechmalls | Published: 2026-06-15
Category: How-to Guides
Master video call lighting and webcam setup with this step-by-step guide. Learn best practices, product picks like the Refurbished MX Brio, and tips for a polished home office look.
In the era of remote work and hybrid meetings, your home office video quality can make or break a professional impression. Whether you're presenting to clients, collaborating with colleagues, or attending virtual interviews, the combination of proper lighting and a reliable webcam is essential. A muddy, poorly lit image can undermine even the most well-prepared message. This guide will walk you through how to set up a professional home office lighting and webcam combo for video calls, ensuring you always look sharp and engaged.
Why Lighting and Webcam Quality Matter More Than You Think
Before diving into equipment, understand that lighting affects how your face is perceived on camera. Harsh overhead lights cast unflattering shadows, while backlight from a window can make you appear as a silhouette. A good webcam, on the other hand, captures details and colors accurately. Together, they create a cohesive, professional look. Research shows that participants in video calls are more likely to trust and engage with people who have clear, well-lit video. So investing in this setup is an investment in your credibility.
Choosing the Right Webcam for Remote Work
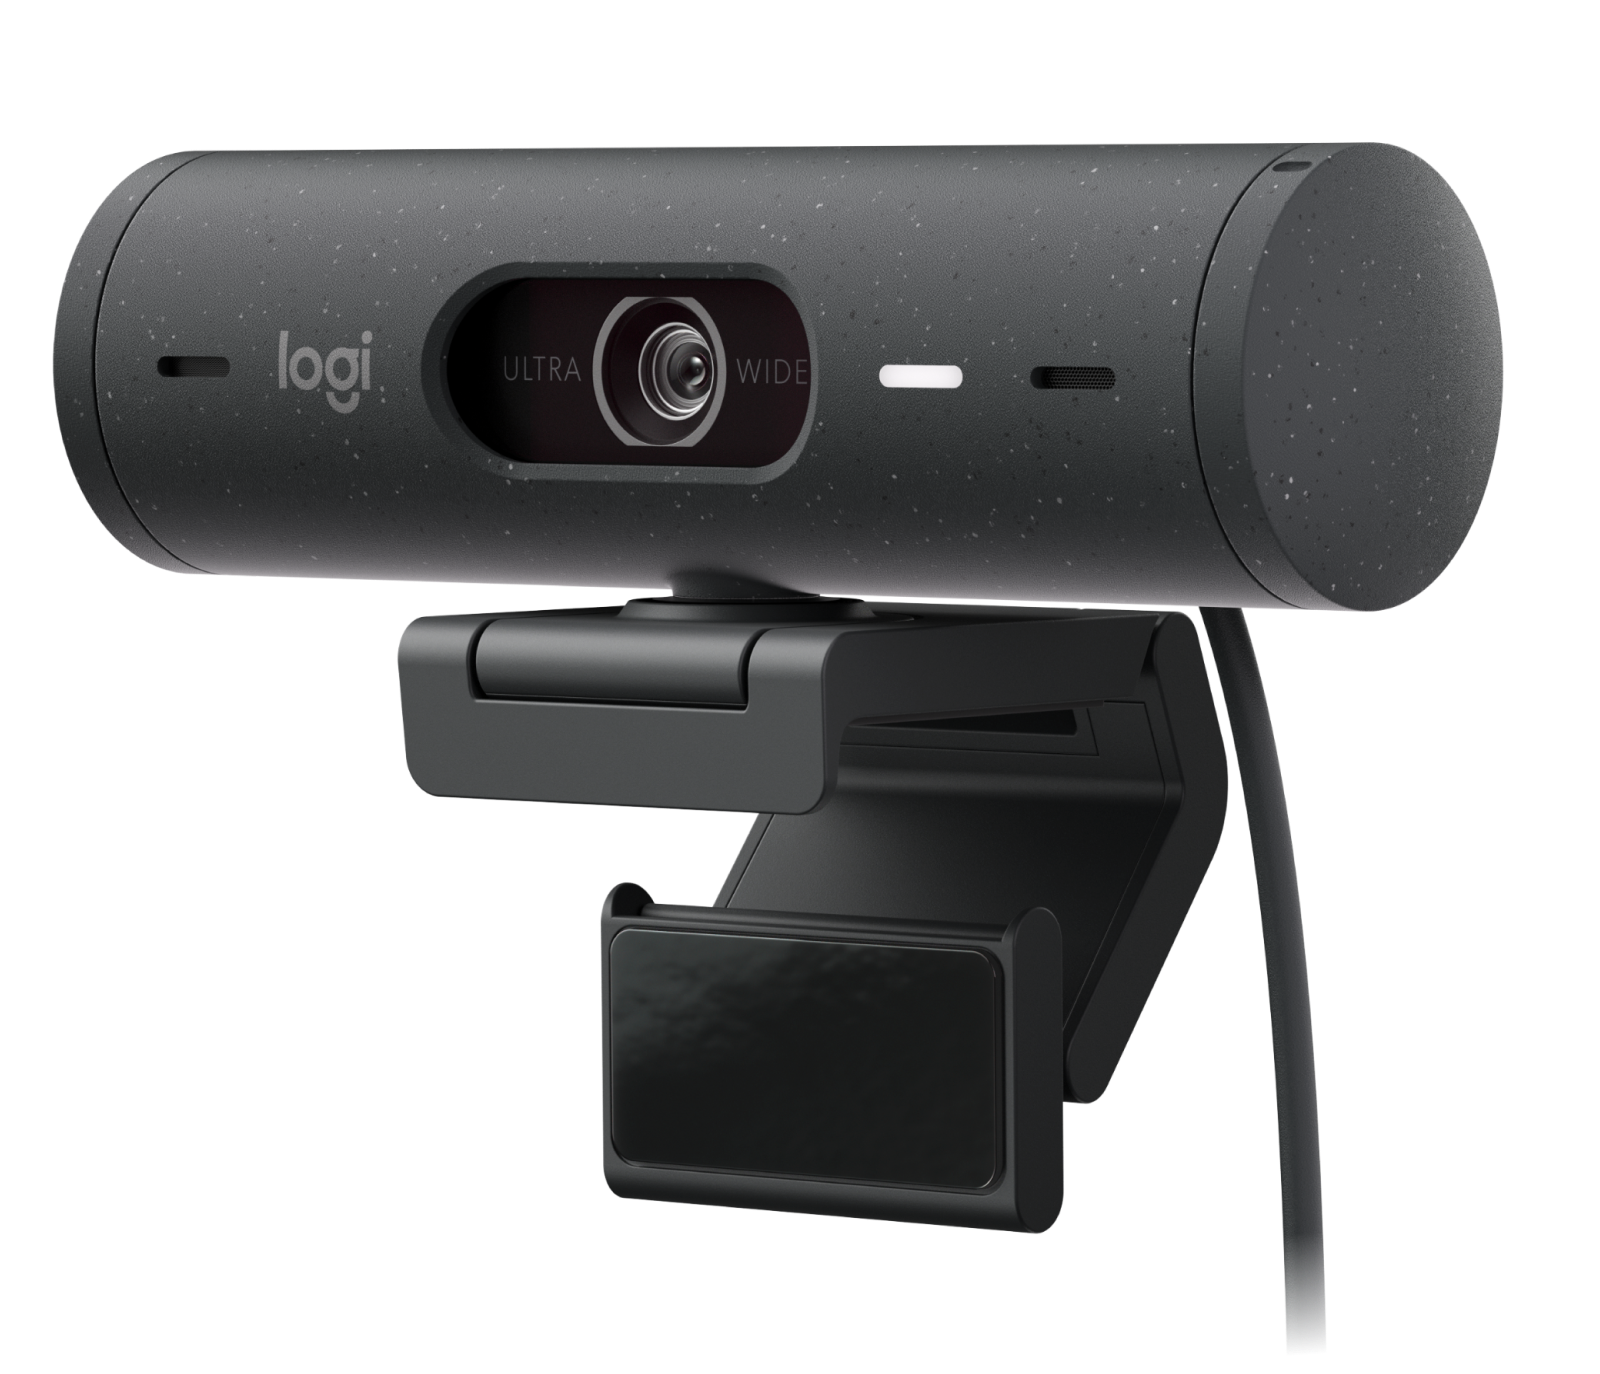
Not all webcams are created equal. For professional video calls, you want at least 1080p resolution, good autofocus, and reliable low-light performance. Built-in laptop cameras often fall short, especially in dim environments. A dedicated webcam solves these issues. Among the top choices is the Refurbished MX Brio - Black, which offers exceptional clarity, AI-enhanced auto-framing, and built-in light correction. Its refurbished status provides the same high performance at a reduced price, making it an excellent value for remote workers.
For those on a tighter budget, the Logitech C270 is a reliable 720p option that still outperforms many laptop cameras when paired with good lighting. The key is to match the webcam to your lighting conditions. A high-end webcam like the MX Brio can compensate for less-than-ideal lighting, but even a basic webcam can shine (literally) with a proper lighting setup.
Key Webcam Features for Video Calls
- Resolution: 1080p is the gold standard; 720p is acceptable for occasional use.
- Field of View: 78° to 90° is ideal for a single person; wider angles for small groups.
- Auto Light Correction: Helps in mixed lighting conditions.
- Built-in Privacy Shutter: Adds peace of mind when not in use.
Mastering Home Office Lighting: The Three-Point Technique
Professional videographers use a three-point lighting setup: key light, fill light, and backlight. You don't need expensive studio gear—just position your light sources effectively. Here’s a simplified version for home offices:
- Key Light: Place your main light source 45 degrees to the side of your face, slightly above eye level. This creates depth and highlights your features.
- Fill Light: Add a softer light on the opposite side to reduce harsh shadows. A desk lamp with a diffuser works well.
- Backlight: Position a light behind you to separate you from the background and add dimension. This can be a small LED panel or even a monitor light.
If you lack space or budget, a single ring light placed directly above your monitor can serve as both key and fill. Just avoid pointing it directly at your face—angle it slightly downward for a natural glow.
Natural Light Considerations
If you work near a window, position yourself so the window is in front of you, not behind. This uses natural daylight as your key light. However, be mindful of changing weather and time of day. You may need to supplement with artificial lights when the sun shifts. A portable LED panel can be adjusted to match the color temperature of your environment.
Integrating Your Webcam and Lighting for Optimal Results
Once you have selected your webcam and lights, it's time to set them up together. First, mount your webcam at eye level—use a small tripod or a stack of books if needed. Then, position your lights so they illuminate your face evenly without creating hot spots on your screen. Test your setup by joining a test call and adjusting the angle of lights until shadows under your eyes and chin disappear.
For advanced users, consider adding a PRO TABLE CLAMP - Black to secure your lighting or camera mount. This clamp provides a stable, adjustable base that keeps your gear in place, reducing the need for constant readjustment during long meetings.
Overcoming Common Lighting and Webcam Problems
Even with the best equipment, issues can arise. Here are solutions to frequent problems:
- Overexposed face: Reduce light intensity or move the light farther away.
- Grainy video: Increase ambient light or upgrade to a webcam with better low-light performance.
- Color cast: Use lights with adjustable color temperature (e.g., 3000K to 5600K) to match your environment.
- Eyes looking down: Raise your webcam to eye level.
Budget-Friendly Alternatives for Beginners
You don't need to spend hundreds to improve your video quality. A simple desk lamp with a white paper towel as a diffuser can act as a soft key light. Pair it with the Logitech C270, which is often available at a low price point. The result will be significantly better than relying solely on your laptop camera. As your needs grow, you can invest in a higher-end webcam like the MX Brio and dedicated lighting panels.
Maintaining Your Setup Over Time
Keep your webcam lens clean with a microfiber cloth. Dust can blur images just as much as poor lighting. Check your lighting setup periodically, especially after moving furniture or changing rooms. If you use the Refurbished MX Brio - Black, its built-in light correction will handle minor variations, but consistent positioning yields the best results.
Putting It All Together: A Sample Setup for Small Home Offices
Imagine you have a compact desk with a laptop. Here's a simple configuration:
- Place your laptop on a stand to raise the screen to eye level.
- Mount the webcam on top of the laptop using its built-in clip.
- Position a ring light directly behind the laptop screen, angled slightly downward toward your face.
- Add a small LED panel on your left side, set to warm white (around 4000K).
- Test the setup in a video app and adjust until you are satisfied.
This setup costs under $150 and yields professional-grade video. It's ideal for daily stand-ups, client meetings, and virtual interviews.
Conclusion: Elevate Your Video Calls Today
Your video presence is a reflection of your professionalism. By combining thoughtful home office lighting with a capable webcam, you can ensure that your ideas—not technical distractions—take center stage. Whether you choose a refurbished high-end model or a budget-friendly starter, the key is to test and iterate. Start with the basics and upgrade as your requirements evolve.
Ready to transform your home office video setup? Explore the Refurbished MX Brio - Black today for a cost-effective way to achieve crisp, clear video calls. Pair it with proper lighting to make every meeting your best impression.